How to Preview Tattoo Placement and Size
Try the same tattoo on your inner forearm and upper arm. Once you find a spot you like, see how it looks a little bigger or smaller.
See the same design in two places
Look at the tail. On the left, it points toward the wrist. On the right, it follows the upper arm toward the elbow. It’s the same snake in both pictures.
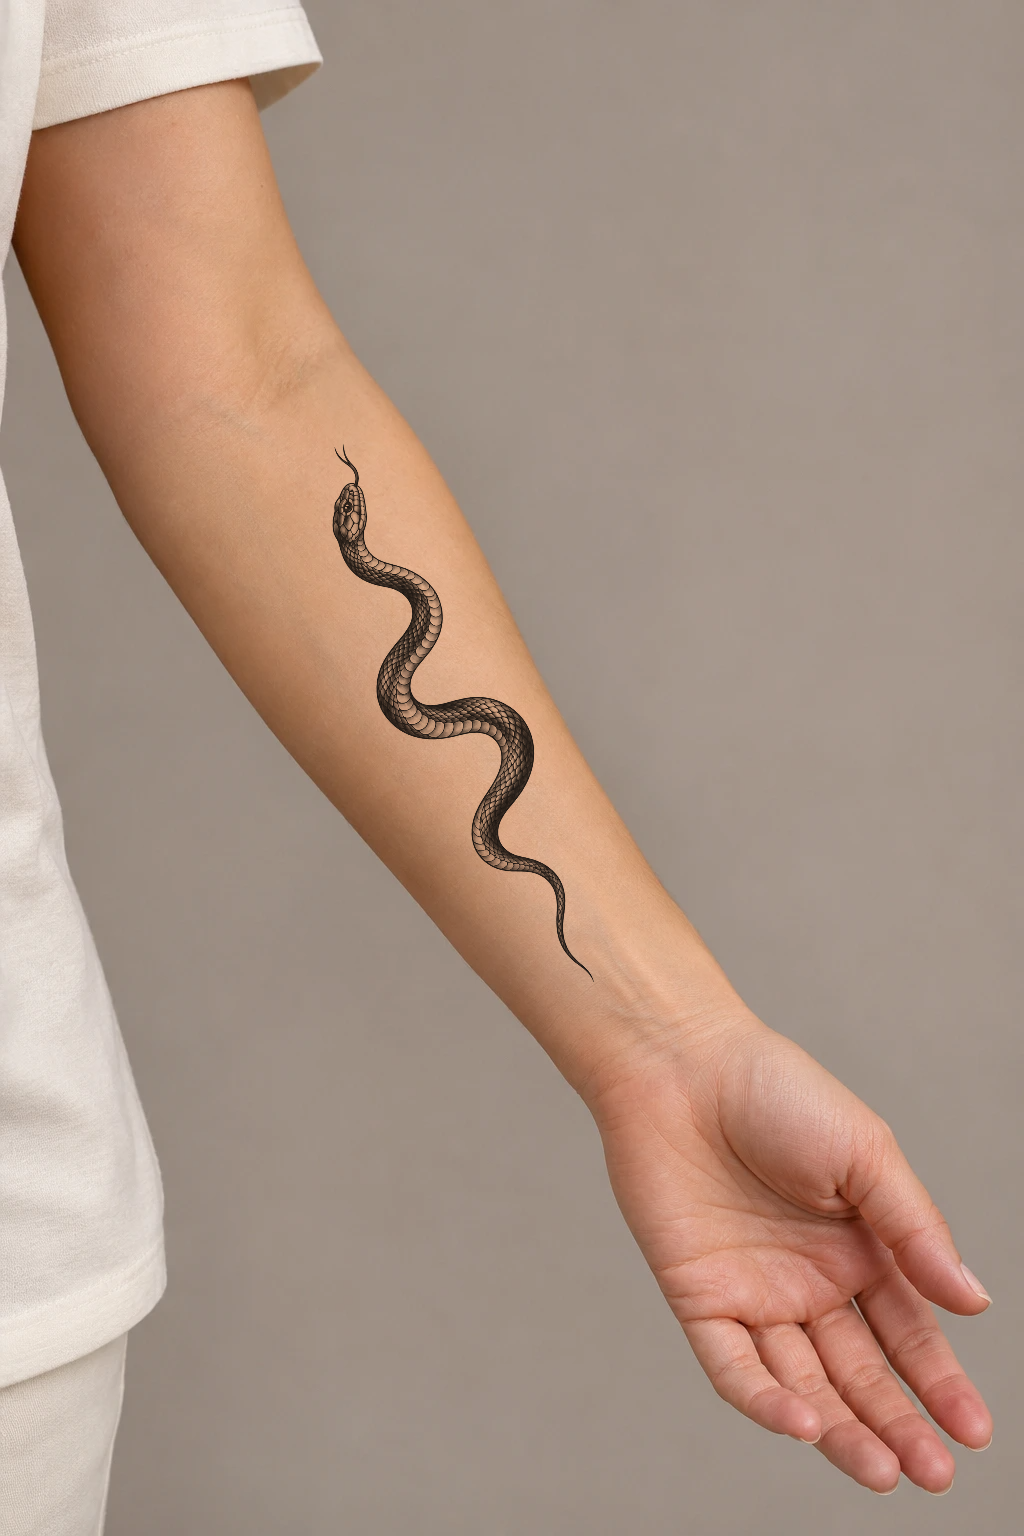
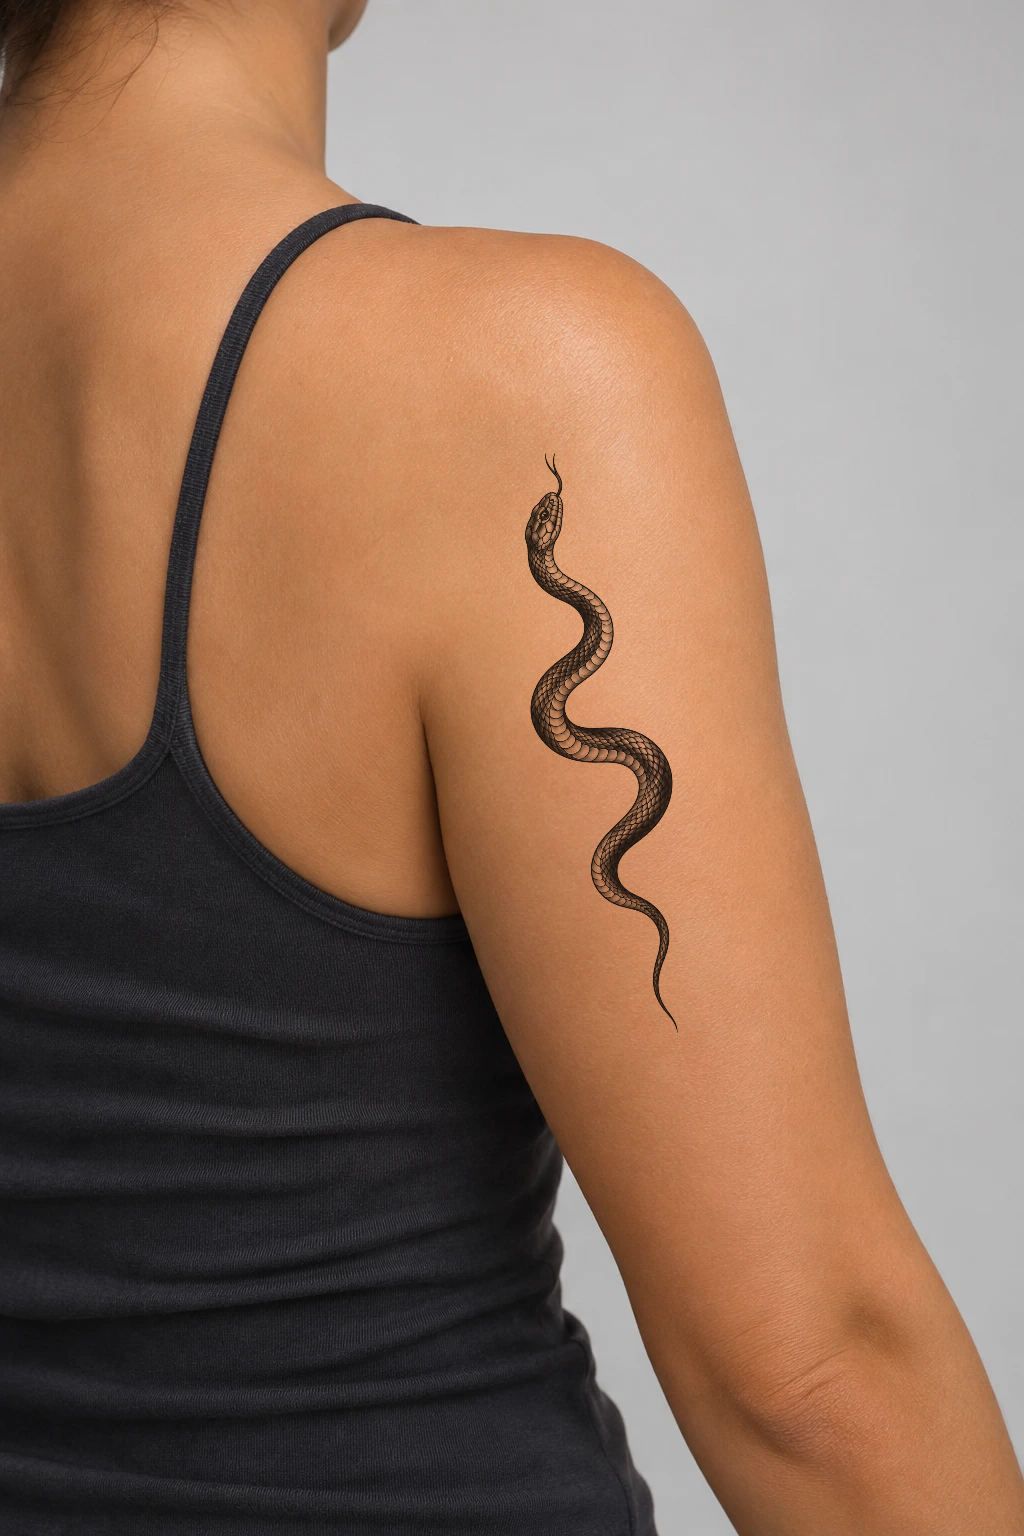
On the forearm, the skin narrows near the tail. On the upper arm, there’s more space beside the middle curve. When you try your own design, start with the part you care about most. If you want it to stop above the wrist, for example, check the tail before adjusting the rest.
Try two sizes on the same photo
Now look at the two forearm photos below. The snake stays in the same spot and points the same way. At 28%, you see more bare skin around the curves. At 40%, the snake takes up more of the forearm, and you can see more of the pattern inside its body.
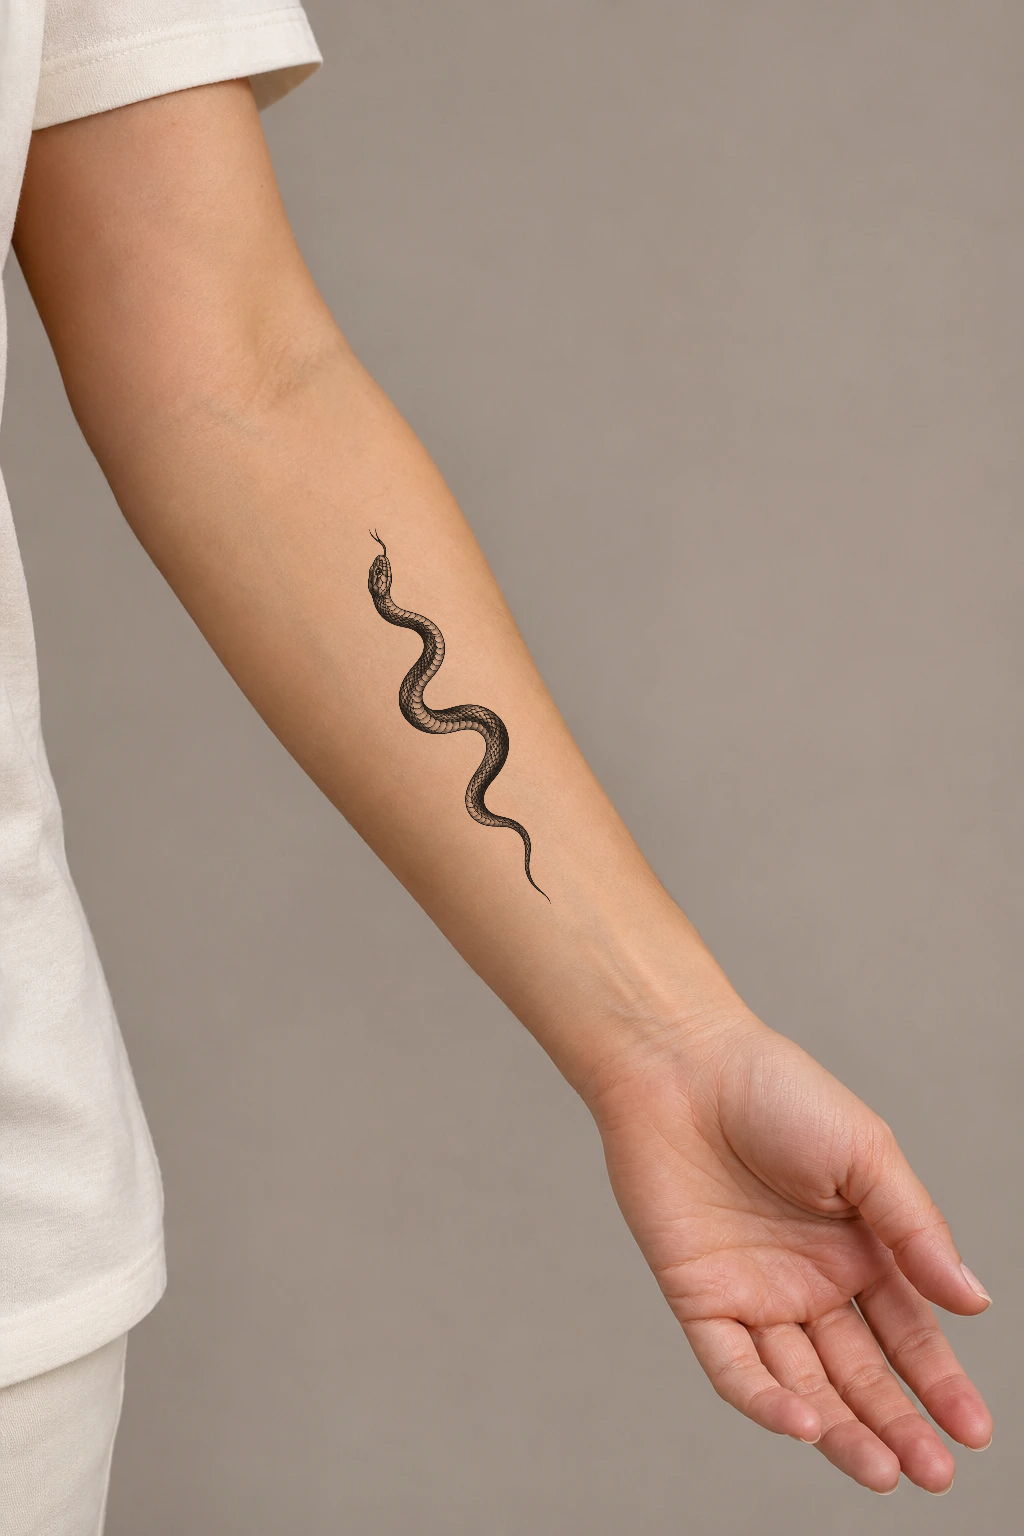
The slider sets the width of the artwork relative to the photo. At 40%, the artwork file spans 40% of the photo’s width. To find out how many centimeters that should be on your arm, ask your artist to measure the spot.
Take photos of the spots you’re considering
Take one photo of each spot you’re considering. Use soft light, relax your arm, and leave enough room in the frame to see where the wrist or elbow is. For the artwork, use a transparent PNG or a clean image on white. If you turn on Remove white background, take a second look at any pale detail you want to keep.
Move, turn, and resize the design
Open InkByYou Try On Tattoo and choose Classic Virtual Tattoo. Add your design and a body photo, then click Preview Result. To practice with the snake, select Inner forearm in the preview and click Try this example.
Drag the design to the spot you’re considering. Pull a corner to make it smaller, or drag the top handle to turn it. When the angle looks right, choose Download to keep a PNG. Classic preview and download work without signing in.
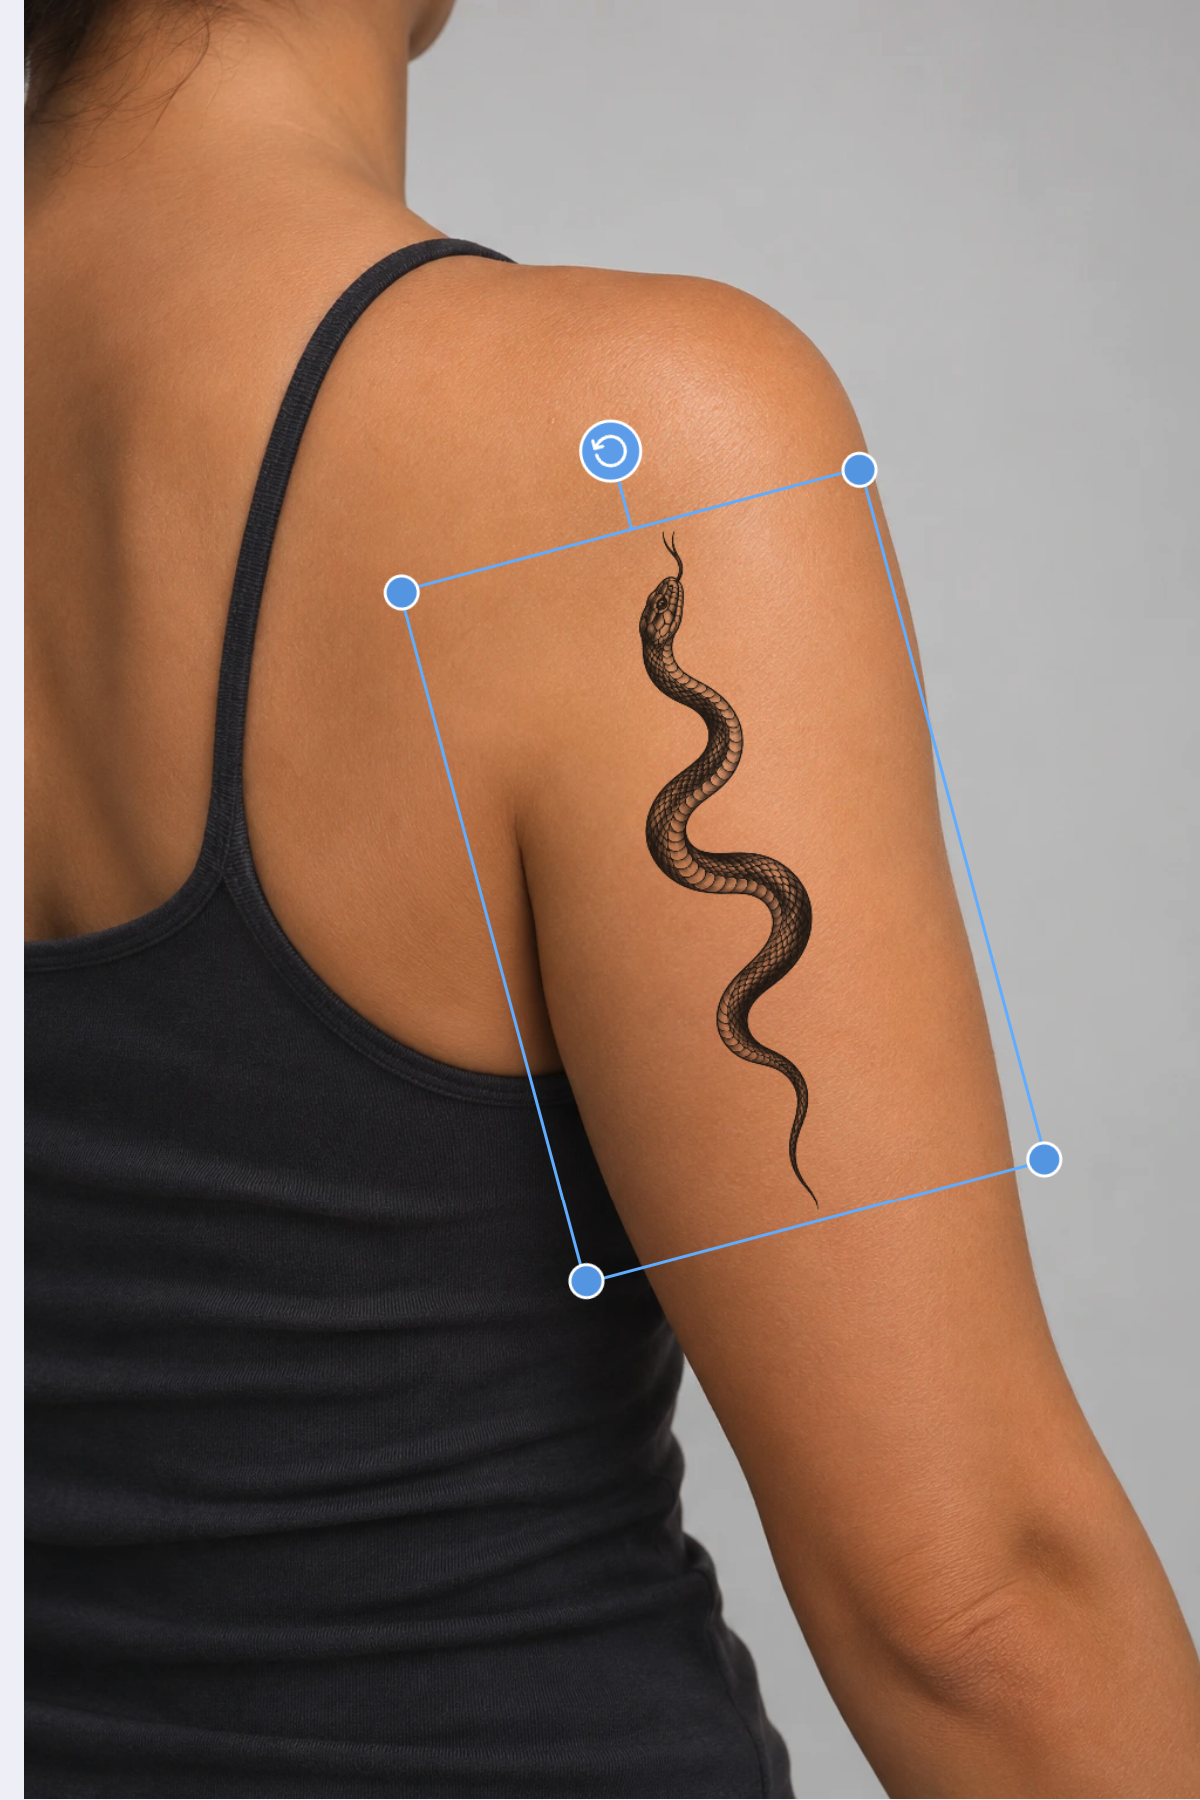
To compare locations, keep the design loaded and switch to another demo photo. Move and turn it to fit the new spot. For the two previews at the top, we used 40% Size and 92% Opacity on both photos, then adjusted the angle for each arm. To compare sizes, stay on one photo. Save one preview, move only the Size slider, then save another.
Check the edges and the fine lines
Step back from the screen. Can you still make out the whole shape? Check where it ends relative to your wrist, elbow, or sleeve. If you care how it looks when you bend your arm, take a second photo with your arm bent and try the design there too.
Now look at the smallest gaps. On the snake, that might be the space between the lines inside a curve. If those lines are easy to separate only when you zoom in, show your artist the smaller preview and ask which details could be simplified.
Show your artist what you prefer
Keep the original artwork and the two previews you’re still choosing between. Give the files names you’ll recognize, such as “forearm-small” and “upper-arm.” Before sharing, check what else is visible in the photo. At the appointment, point to the spot where you’d like the design to start and end, then ask your artist to check the width and the spacing between lines.
Preview your tattoo placement